
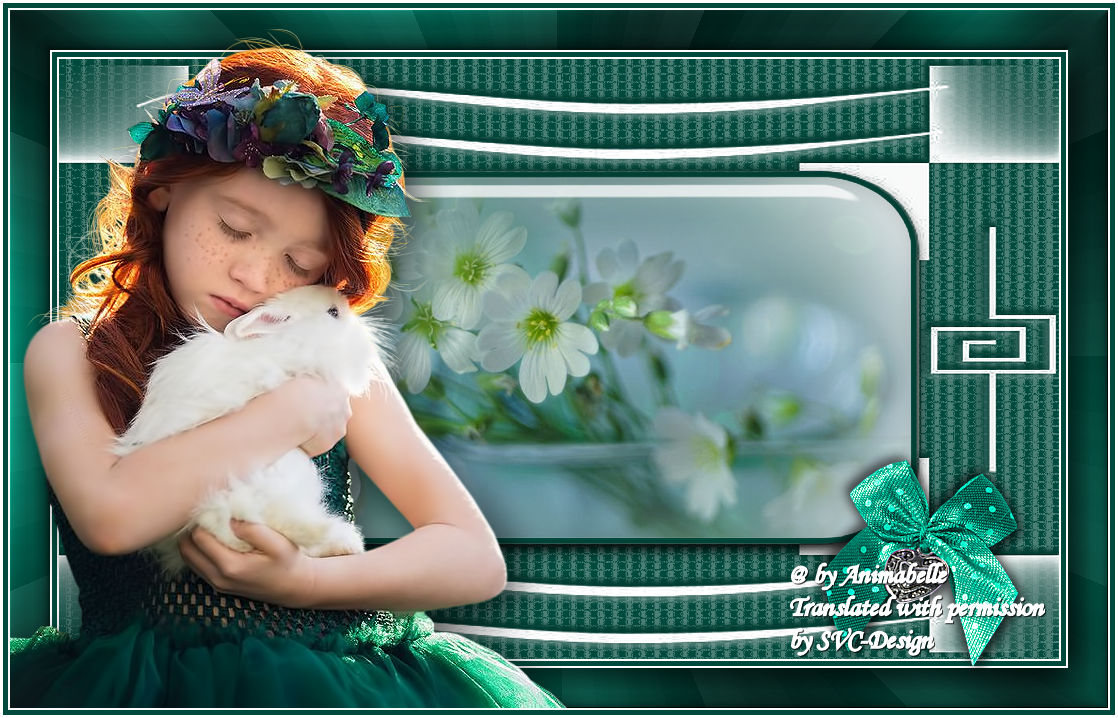
This lesson is made with PSPX9
But is good with other versions.
© by SvC-Design

Materialen Download :
Here
******************************************************************
Materials:
104_enfant_p2_animabelle.png
202_fleurs_animabelle_page3.png
Calque_Alpha_Animabelle.pspimage
Glass1_Animabelle.f1s
noeud_animabelle.pspimage
zuzzanna_mask61.jpg
******************************************************************
Plugin:
Plugins - Alien Skin Eye Candy 5: Impact - Glass
Plugin – Unlimited 2.0 - Tramages - Pool Shadow
Plugin - Unlimited 2.0 - Tramages - Gradient - Spokes Ratio Maker
******************************************************************
color palette
:
******************************************************************
methode
When using other tubes and colors, the mixing mode and / or layer coverage may differ
******************************************************************
General Preparations:
First install your filters for your PSP!
Masks: Save to your mask folder in PSP, unless noted otherwise
Texture & Pattern: Save to your Texture Folder in PSP
Selections: Save to your folder Selections in PSP
Open your tubes in PSP
******************************************************************
We will start - Have fun!
Remember to save your work on a regular basis
******************************************************************
1.
Open all the necessary hardware in your PSP
Duplicate it, close the originals
Remember to save your work often
Thanks to Linette for her explanations (Mirror and flip) for psp18
2.
Activate the eyedropper tool
Take 2 beautiful colors matching your tubes, images, misteds ...
Here are the ones I chose for this tutorial
Color 1 #ffffff
Color 2 # 004a3d
Feel free to change the layer blending mode and opacity, if needed
Open the tube "104_enfant_p2_animabelle" and the misted "202_fleurs_animabelle_page3"
Window - Duplicate (close originals)
Remove watermarks with the tool of your choice (eraser, selection ...)
Put them aside, they will be ready, when you need them
Proceed in the same way with all the other elements of the tutorials
3.
Double click on the "Glass1_Animabelle" preset; it will automatically put itself in the appropriate filter
Open the Apha layer "Calque_Alpha_Animabelle"
Window - Duplicate
Close the original and activate its copy
Fill it with color 2
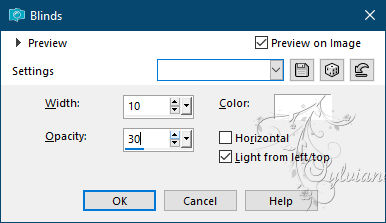
Effects - Texture effect - Blind - Color 1
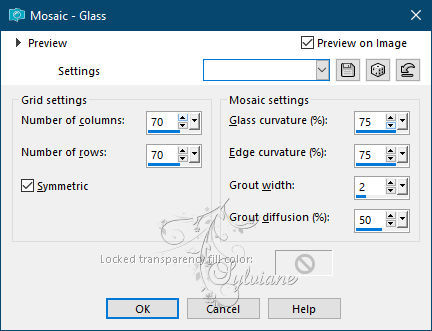
Effects - texture effects – Mosaic -Glass
4.
Layers - New Raster Layer
Fill it with color 1
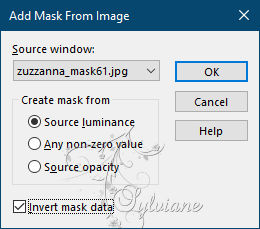
Layers - New Mask Layer - From Image - zuzzanna_mask61.jpg
Layers - Merge - Merge Group
Effects - 3D effect - Drop shadow
- 5 / 0/100/5 / Color # 023c32
Do it again a second time as below
0 / - 5 / 100/5 / Color # 023c32
Settings - Sharpness - Sharpness
5.
Layers - New Raster Layer
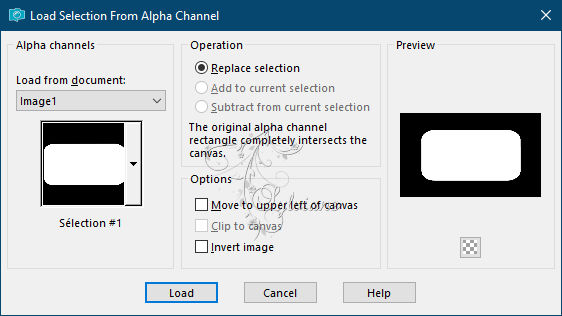
Selections - Load / Save - Load selection from Alpha Channel -
selection # 1
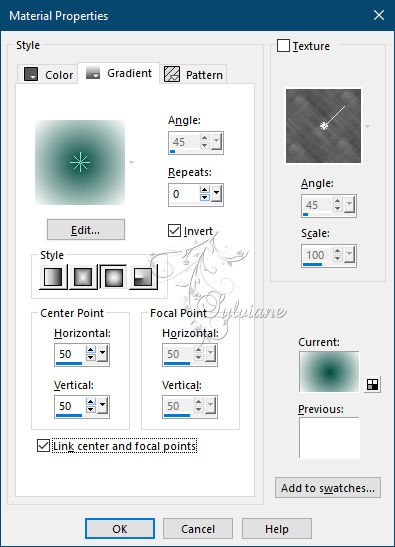
Fill the selection with the following Halo gradient
6.
Open 202_fleurs_animabelle_page3.png
Edit – Copy
Edit - Paste as new layer
Image - Resize to 80%
(resize all layers: unchecked)
Place the misted in the center of the selection
Selections - Invert
Press the Delete key once. from your keyboard
Selections - Invert again
Settings - Sharpness - Sharpness
7.
Selections - modify - select selection borders
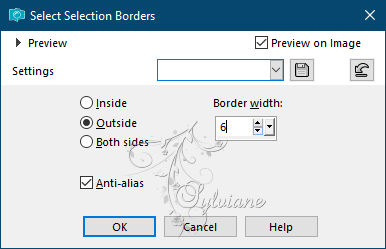
Fill the selection with color 2
Layers – merge – merge down
Selection - Select None
Plugins - Alien Skin Eye Candy 5: Impact - Glass
Apply the preset "Glass1_Animabelle"

Layers - Merge - Merge visible layers
8.
Image - Add Borders - symmetrical borders of 2 pixels color 1
Image - Add Borders - symmetrical borders of 5 pixels color 2
Image - Add Borders - symmetrical borders of 2 pixels color 1
Selections - Select all
Image - Add Borders - symmetrical borders of 40 pixels color 2
Selections - Invert
Selections – Promote selections to layer
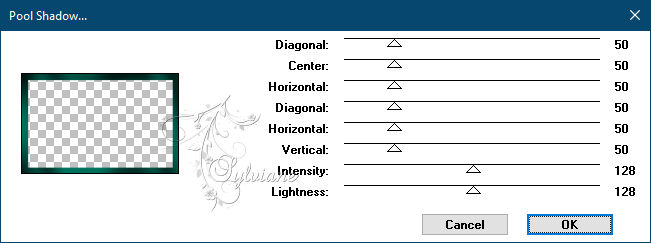
Plugin – Unlimited 2.0 - Tramages - Pool Shadow
9.
Layers - Duplicate
Plugin - Unlimited 2.0 - Tramages - Gradient - Spokes Ratio Maker... default

Layers - Properties - Opacities at 30
Adjust – scharpness – scharpen
Layers – merge – merge down
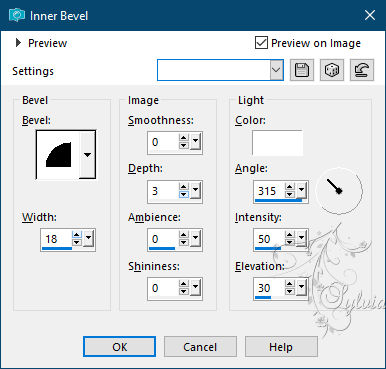
Effects – 3D effects – inner bevel
Selections - Invert
Effects - 3D effect - Drop shadow
11/11/100/55 / Black
Selection - Select None
10.
Open 104_enfant_p2_animabelle.png
Edit – Copy
Edit - Paste as new layer
Place it at the bottom left
Effects - 3D effect - Drop shadow
11/11/65/55 color:#000000
11.
Open noeud_animabelle.pspimage
Window - Duplicate
Close the original and activate its copy
Adjustments - Hue and saturation - Colorize
Hue at 121 - Saturation at 255
(Change these settings
according to your personal colors)
Selection - Select None
12.
Edit - Copy
Edit - Paste as new layer
Image / Resize to 50%
(resize all layers: unchecked)
Place it at the bottom right
Adjust – scharpness – scharpen more
Effects - 3D effect - Drop shadow
5/5/65/15 color:#000000
Redo it in negative
- 5 / - 5/65/15 color:#000000
13.
Image - Add Borders - symmetrical borders of 2 pixels color 1
Image - Add Borders - symmetrical borders of 5 pixels color 2
Image - Add Borders - symmetrical borders of 2 pixels color 1
Image - Resize your tag to 900 pixels wide before sending it to me. Thank you
Layers - New raster layer
Apply your watermark (Signature)
Layer – merge – merge all (flatten)
Save as JPEG
Back
Copyright Translation © 2021 by SvC-Design